See What They're Doing: Vision-Powered Abacus Detection
Our new ML-powered vision system watches your child's physical abacus in real-time, providing instant feedback as they work through problems—bridging the gap between hands-on learning and digital guidance.
There's something magical about watching a child work through a math problem on a physical abacus. Their fingers move the beads, their mind calculates, and slowly the answer takes shape. But as a parent or teacher, you might wonder: How do I know if they're on the right track?
Today we're excited to announce a feature that bridges this gap: real-time vision-powered abacus detection.
The Challenge of Physical Practice
The soroban (Japanese abacus) is a powerful tool for developing number sense and mental math abilities. But it presents a unique challenge for digital learning platforms:
The abacus is physical. The feedback is digital.
Until now, students using our practice system had two options:
- Use the on-screen digital abacus (convenient, but not the same as physical practice)
- Use their physical abacus, then manually enter the answer (loses the step-by-step feedback)
Neither option fully captured the experience of a teacher looking over a student's shoulder, nodding as they correctly add each term, gently redirecting when they slip.
How It Works
Our new vision system uses your device's camera to watch the physical abacus in real time. Here's what happens:
1. Set Up Your Camera
Point your camera at your soroban. The system uses ArUco markers (small printed patterns) placed near your abacus to calibrate the view and identify each column precisely.
2. Work the Problem Naturally
As your child works through a problem like 45 + 32, they manipulate beads just as they normally would. No special gestures, no pausing to "scan"—just natural abacus use.
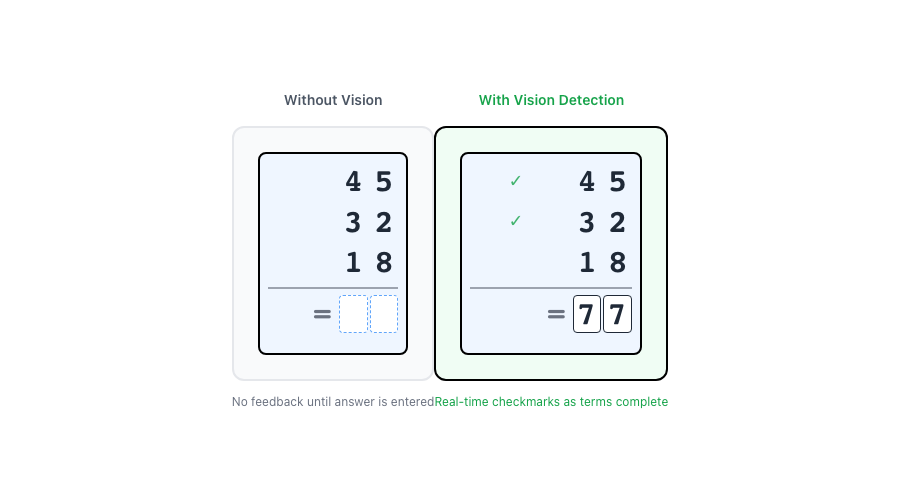
3. Get Real-Time Feedback
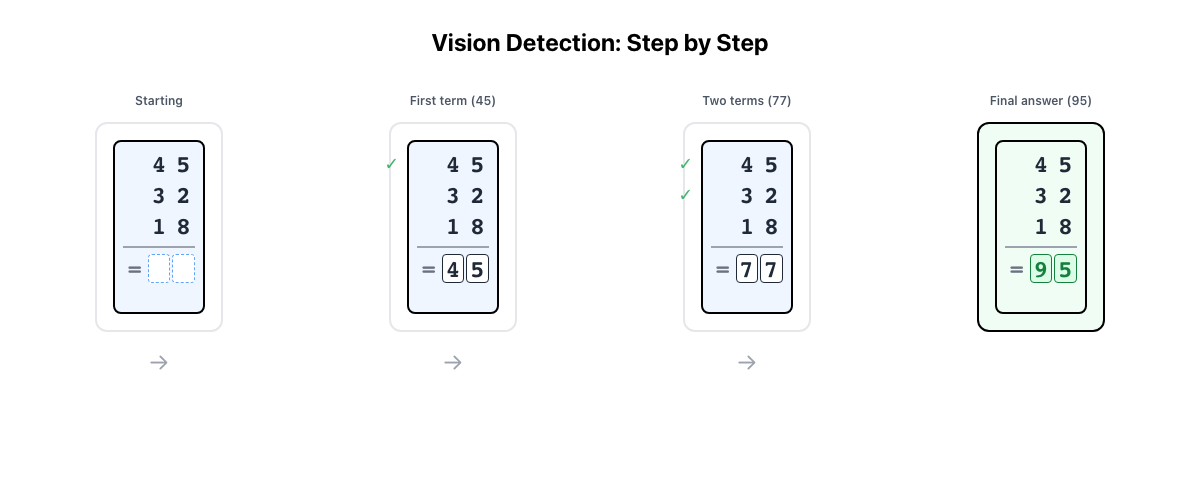
Here's where the magic happens. Our ML model analyzes each column of the abacus 10 times per second, recognizing the digit displayed. As the student completes each term:
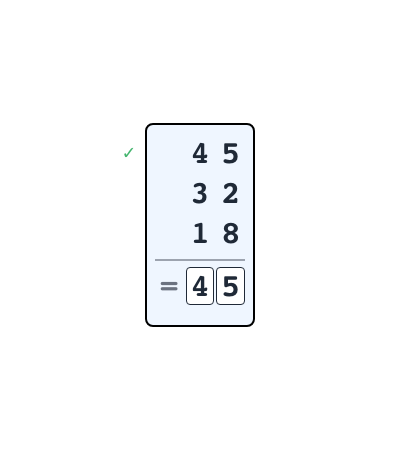
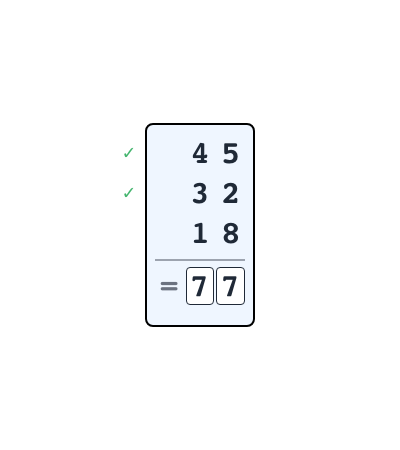
- Checkmarks appear next to completed terms in the problem display
- Help mode activates if they've entered a partial sum (showing them the next step)
- Auto-submit triggers when the correct final answer appears
The student sees their physical actions reflected instantly in the digital interface—validation that they're doing it right.
The Technology Behind It
We built a custom machine learning model specifically for soroban column recognition. Unlike generic digit recognition, our model understands the unique structure of an abacus:
- Heaven beads (the single bead above the reckoning bar, worth 5)
- Earth beads (the four beads below, worth 1 each)
The model predicts both components separately, then combines them: digit = heaven × 5 + earth. This architecture makes it remarkably accurate even with varying lighting, camera angles, and abacus styles.
Stability Over Speed
Raw ML predictions can be noisy—a brief hand shadow might cause a misread. Our stability system requires consistent readings across multiple frames before updating. This means:
- No flickering numbers as beads move
- No false "correct!" signals from momentary misreads
- Smooth, confident detection that matches human perception
Why This Matters for Learning
Immediate Feedback Loop
Research consistently shows that immediate feedback accelerates learning. When a student adds 45 and sees a checkmark appear, they know instantly that they've got it right. No waiting, no uncertainty.
Scaffolded Independence
The system doesn't just watch—it helps. When a student shows a prefix sum (like 45 after the first term of 45 + 32), the system recognizes they might need guidance and offers help mode. But when they show 77 (the correct answer), it auto-submits and celebrates their success.
Physical Skill Development
By validating physical abacus use rather than replacing it, students develop real tactile skills. Their fingers learn the movements. Their spatial sense strengthens. The digital system supports without substituting.
Setting Up Vision Mode: Step by Step
Getting started takes just a few minutes, and the system remembers your setup for future sessions.
Step 1: Print and Attach the ArUco Markers
The system uses four small printed patterns (called ArUco markers) to locate your abacus in the camera view. These markers enable automatic calibration—no manual adjustment needed.
- Go to Create → Vision Markers
- Download the printable PDF or individual marker files
- Print at 100% scale (don't use "fit to page")
- Cut out each marker with a small white border (2-3mm)
- Attach to your abacus frame corners:
- Marker 0 → Top-left
- Marker 1 → Top-right
- Marker 2 → Bottom-right
- Marker 3 → Bottom-left
Tip: Double-sided tape works great. Keep the markers flat and visible.
Step 2: Start a Practice Session
- Navigate to your student's practice page
- Click the abacus button (bottom-right corner) to open your MyAbacus
- The abacus will dock into the practice interface
Step 3: Enable Vision Mode
- Look for the camera icon (📷) in the corner of the docked abacus
- 🔴 Red dot = not configured yet
- ⚪ Gray = configured but disabled
- 🟢 Green = active and detecting
- Click the camera icon to open Vision Settings
Step 4: Choose Your Camera
You have two options:
Option A: Computer Camera (💻 This Device)
- Select your webcam from the dropdown
- Grant camera permission when prompted
- Position the camera to see your abacus clearly
Option B: Phone Camera (📱 Phone Camera)
- Scan the QR code with your phone
- Your phone becomes a wireless camera
- Great for overhead desk views
Step 5: Automatic Calibration
Once your camera sees the ArUco markers:
- The system shows "Looking for markers (0/4 found)"
- As markers are detected: 1/4 → 2/4 → 3/4 → 4/4
- When all 4 are found: "Auto-crop using markers" appears in green
- A preview shows the perspective-corrected abacus view
No markers? Click "Set crop manually instead" to drag corners and column dividers yourself.
Step 6: Enable and Practice!
- Click "Enable Vision"
- The camera feed replaces the digital abacus display
- You'll see:
- Live video of your physical abacus
- Detected value shown at the bottom
- Confidence percentage
- Start working problems—the system detects your moves automatically!
Your Settings Are Saved
Once configured, the system remembers:
- Your camera selection
- Your calibration setup
- Whether vision was enabled
Next time you dock your abacus, just click the camera icon and enable—no recalibration needed unless you move your setup.
What's Next
This is just the beginning. We're exploring:
- Multiple abacus detection for classroom settings
- Technique analysis to identify and correct common bead manipulation errors
- Progress visualization showing improvement in speed and accuracy over time
The goal remains the same: make physical abacus practice as supported and insightful as digital practice, while preserving everything that makes the soroban special.
Have questions about vision-powered practice? We'd love to hear from you. The best learning tools are built in partnership with the teachers and families who use them.